
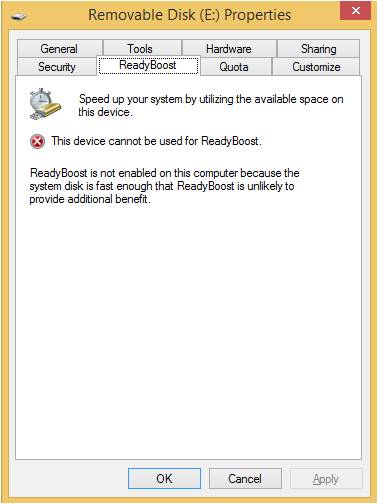
Whilst writing a presentation on USB Forensics, I was hit with a problem with ReadyBoost being disabled on my Virtual Machine. The message would read
This device cannot be used for ReadyBoost. ReadyBoost is not enabled on this computer because the system disk is fast enough that ReadyBoost is unlikely to provide additional benefit.
Looking around on the internet most answers point to setting Superfetch service to automatic and starting it. This does not work for this error, ReadyBoost is working, but thinks it knows best!
After a lot of annoying pages I decided to take matters into my own hands! Within the SYSTEM hive (under CurrentControlSet) is the Services key and under there is “Rdyboost”, this contains all of the parameters that ReadyBoost uses to decide on if your USB Stick is up to the challenge.

Under the “Attachstate” subkey there will be a number of settings, on this VM there are 2x USB devices and 1x HDD, on my live system it is not so easy, there are several HDD all with ambiguous names (found the right one with trial and error). This value will be DWORD=2 to produce the above error, simply set it to DWORD=0 to allow ReadyBoost to come back to life.
The properties of the USB stick now show the following:
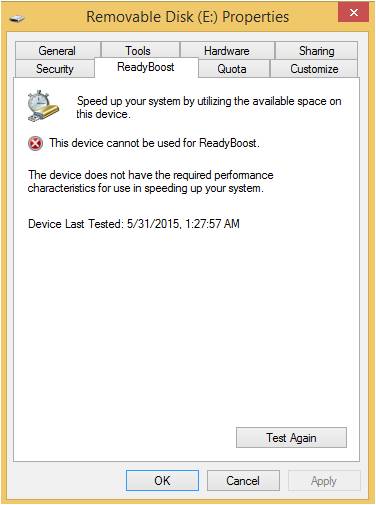
Although the USB stick is not fast enough to be used, it does prove that it is now working. The reason for setting this up was to populate the EMDMgmt key for forensic analysis.

Pingback: Force Enabling ReadyBoost (for USB Forensics) | infopunk.org
Worked! many thanks!
My values are all 3. I have found the one that is my 60GB SSD that I would like to use.
I am still presented with the message “This device cannot be used for ReadyBoost. ReadyBoost is not enabled because this computer is fast enough that ReadyBoost iis unlikely to provide additional benefit.” when I choose the ReadyBoost tab of my SSD.
I am still upset that Microsoft will not allow ReadyBoost for any system. Some people have slower disk drives and could put a small SSD to help offload the immediate reads.
I did however try something else.
* My OS was on a PCIe raid controller (non-Intel).
* My on board chipset is Intel that was only hosting a DVD drive.
* I degraded the Raid 1 Mirror on the “PCIe” controller
* Moved one drive to the Intel on board controller.
* Wiped the “Intel” drive and cloned the “PCIe” to it.
* Booted to Windows on “Intel” drive and enabled “Safe Boot” from msconfig then shut down.
* Entered BIOS and changed AHCI to RAID on the Intel Controller
* Booted Safe Mode Windows to desktop and restored “Original Boot Config” and shut down.
* Normal boot to windows with 1 drive and Intel RAID enabled.
* Installed Intel Rapid Storage Technology.
* Moved 2nd “PCIe” drive to “Intel” and created a Mirror.
* Enabled Performance Disk Cache for my new Intel RAID.
This is having to us an alternative to Microsoft’s idea since they remain dormant.
This seems to be skewed probably because the file is smaller than the SSD cache drive.
I tried a real-world scenario. This is a 10gb file moved from my production SSD raid.
The first 5gb moved at almost 600 MB/s then slowed to the normal HDD speeds from my previous post.
TL;DR – Microsoft has retired ReadyBoost but has not removed it from the OS. Intel Rapid Storage with SSD Cache was my solution.
Perfect! I’ve been using Windows 8.1 Enterprise (To Go) usb drive to work on various systems. My guess is that when I booted a system with it that had an SSD it then set this value which of course wouldn’t work with other systems. Good sleuthing.
Thanks. This worked for me on windows 7 ultimate.
Thanks to this article, I had success turning ReadyBoost on…even with an SSD as the main system disk.
I actually went a step further in my T500 with an EVO 850 SSD running the Samsung Rapidmode with 8GB of RAM. Rapidmode with the 850 EVO SSD is much faster than a HDD but with readyboost enabled on a RAMDISK drive my windows 7 system is that much more responsive. I think it works so well because the T500 is still running SATA 2 on the mainboard.
This is what I did:
1. Install Dataram Ramdisk ( I was using V4_4_0_RC34). I also use Softperfects Ramdisk but it does not work with the Readyboost feature.
2. Set up a ramdisk size based on your installed ram. I only used a small 260MB ramdisk size and stayed with the default FAT format. Even a small readyboost cache of 260MB gives noticeably snappier performance and does not take up much system RAM. I also recommended ticking the option the label the device as it will be easier to find in the next step.
3. Open Regedit and go to: HKLM (Local Machine)->SOFTWARE->Microsoft->Windows NT->CurrentVersion->EMDgmt. Find your device and left click on it( it should be labelled RAMDISK). In the right hand pane of regedit, double click “device status” and set it to 2.
4. Also in Regedit, go to: HKEY_LOCAL_MACHINE\SYSTEM\CurrentControlSet\services\rdyboost\AttachState. In the right hand panel, I set all the variable values to “0”.
5. Open services.msc and set Superfetch to automatic and start it.
6. Open “my Computer” and right click the Ramdisk drive you created and select Properties.
7. Select the Readyboost drive tab and set it to “Use this disk” or “dedicate this device”. I dedicated the entire 260MB to Readyboost with good results.
I also enabled readyboost on RAM drive for a T61 with 6GB RAM running windows 7 and got the exact same performance boost as the T500 machine. The t61 is running an 840 EVO SSD as the system disk and it has been modified with the Middleton BIOS so it is also running at SATA II speed. However, rapidmode chews up too many cpu cycles and RAM so I keep it off for this laptop.
I may even turn off rapidmode on my T500 thinkpad as the T61 with readyboost and the 500GB 840EVO is every bit as fast as the T500 with a 256GB 850 EVO with rapidmode and readyboost enabled. It would appear that any SSD throttled by SATA 2 could benefit from this readyboost trick.
Thanks to Hatsoffsec!
Thanks a lot!
It’s working for me…
its 2022 , and your answer is still awesome
Thanks 🙂
Great stuff but could you find a work-around for windows 10? These steps do not work for me.
I will see what I can do, but I am working out of the country at the minute so I have limited access.
Hello,
Did you find a way on how to do this in windows 10? I want to use my Samsung EvoSD card 120GB for ready boost in my 2gb ram tablet and see if it will benefit. My tablet got an eMMC 32GB and readyboost is disables.
Good find. Thank you.
Thank you ! it does work for me.
Didn’t work for me. It’s already set to DWORD=0 and I am still getting the first error.
this is what worked for me in win. 7. in Regedit, go to: HKEY_LOCAL_MACHINE\SYSTEM\CurrentControlSet\services\rdyboost\AttachState. In the right hand panel, I set all the variable values to “0”. (right click on each and choose Modify then type 0 (zero) for all of them. After you’re done Right click on the USB drive and choose the readyboost tab.
Thanks Fredrick it worked on my win 7 samsung ssd 250gb
“this is what worked for me in win. 7. in Regedit, go to: HKEY_LOCAL_MACHINE\SYSTEM\CurrentControlSet\services\rdyboost\AttachState. In the right hand panel, I set all the variable values to “0”. (right click on each and choose Modify then type 0 (zero) for all of them. After you’re done Right click on the USB drive and choose the readyboost tab.”
Bravo!! Thank you very much for posting this piece of information. I am using an SSD for boot and didn’t want to set my paging on the same, to save some writing on the SSD. I was able to use my USB flash drive for readyboot.
NOT WORKING!! Because in that AttachedState registry key, there is 0 devices.
OS: Windows 10
Storage: System on SSD, pagefile on HDD, two drives in total.
This is driving me nuts already, I just want to force windows to enable the fuging readyboost because it will cache some of that pagefile to my USB drive but I cannot because everyone gives advices like above which aren’t working -_-
I know what you mean, it’s really frustrating when I read an article clearly labelled for a completely different operating system to the one i’m working on and yet the instructions don’t work. These people really should give up blogging in their spare time for free and stop wasting other peoples valuable time (which is clearly too valuable to waste reading all of the words of an article)